Wednesday, June 23, 2010

Day 3 Goals

Yesterday we blazed through a lot of stuff...
  • We started working with the keyboard
  • We learned the names of all the keys
  • We learned how to play and figure out Major scales
  • We were introduced to two new Reason instruments (NN19, Subtractor)

Goals for today:
  • Get familiar with the sound and feel of the minor scale
  • Learn a bit about the history of hip hop/electronic music production
  • Get introduced to the concept of song structure
In addition, we will have a special guest lecture from Ingrid Hu-Dahl, the Director of BAVC's Next Gen youth programs, about fundraising and media literacy.

Tuesday, June 22, 2010

Basic keyboarding (pt. 4)


Materials:
• Keyboard worksheet (0901_Keyboard worksheet.doc)
• Pencils/pens
• Computer with internet connection and speakers.
• Examples of popular music using Major and Minor scales.

Discussion:
Quick recap!
• How many different notes are there on a keyboard?
• What are the names of the white keys of the keyboard?
• What’s a sharp? A flat?
• What’s a scale?

Remember we said last time that a scale is a set of notes that sound good with each other. They provide a frame for you to create melodies and help you to figure out different directions for your music.

Two of the most common scales in Western/American music are the Major and Minor scales. Generally speaking...
• the Major scale sounds happy/upbeat. You hear it a lot in pop music.
• the minor scale sounds more sad, dark, or intense. You hear it a lot in hip hop and other harder styles of music.

(Instructor: play examples of each type of scale.)

Scales are created by the way the notes are spaced out on the keyboard. Take a look...


When two notes are right next to each other, it is called a half step (for example C to C#).
When two notes have a note in between them, it is called a whole step (for example, C to D).

How much space is in between G and A? E and F? Eb and F?

OK, so now that we know about whole steps and half steps, I'm going to reveal to you the magic formula that will let you make a Major scale from any key on your keyboard...

Major scale formula:

W-W-H-W-W-W-H


In this formula, W stands for “whole step” and H stands for “half step”.

Once you know the formula for a scale, it doesn't really matter what key you start on. You can always make the kind of scale that you want. Today, we are only focusing on the Major scale, so let's hear for ourselves what I'm talking about...

(Instructor: check to make sure that students are clear on the difference between whole/half steps and sharps/flats. W/H steps = spaces between keys, S/F = names of keys)

Please do the following:

Part 1
(Instructor: hand back students’ Keyboard Worksheets from previous class.)

Working from our Keyboard Worksheets, let’s figure out the notes of the G Major scale.
1. Find the note of G and mark it on your worksheet.
2. Using the Major scale formula (W-W-H-W-W-W-H), find and mark the rest of the notes in the scale.
3. Have the instructor check your worksheet before moving on to Part 2.

Part 2
1. Start a new Reason file.
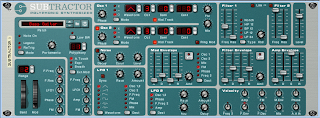
2. Create a SubTractor Analog Synthesizer.

3. Click the Browse Patch button and go into Reason Factory Sound Bank>Subtractor

4. Spend a few minutes clicking through the different folders and trying different sounds. When you find one you like, double-click.
5. Set your Loop Markers so that L is on Bar 1 and R is on Bar 5.
6. Make sure that the Loop On/Off and Click buttons are lit up.

7. Hit Play and listen to the Tempo. Set it to a speed you think you can play.
8. Looking at your worksheet, practice playing the G Major scale in time with the click - each note should be played on a click!
9. Adjust the Tempo to whatever is comfortable for you; if it is too fast, slow it down!
10. When you are confident about playing it, go ahead and hit the Record button and then Play to start recording. Remember to wait for the Playhead to loop back before you start playing!
11. Save it as: your name_GMajorScale
12. Show one of the instructors before moving on.

Part 3
1. Start a new Reason file.
2. Create a Redrum.
3. Make a 32-step drum beat and use Copy Pattern to Track to put it in your Sequencer.
4. Click the Pattern Button to turn it off to make sure you don't hear a double of your beat.


5. Create a SubTractor Analog Synthesizer and load a sound you like.

6. Looking at your worksheet, come up with an original melody using the G Major Scale...
  • Start with G
  • ONLY USE notes that you marked on your worksheet
7. Create 2 more instruments (NNXT, NN19, Subtractor, etc.) and make additional parts to your song. These parts should also use the notes from G Major.
8. Save this as: your name_GMajorBeat


Basic Keyboarding (pt. 3)


Materials
• BUMP Beats Keyboard Worksheets
• Pencils or pens

Discussion
Last time we learned the white keys of the keyboard. What are their names?

Today, we're going to talk a little bit about the remaining black keys.

The black keys are a little bit trickier, because they don't have their own letters like the white keys do (ABCDEFG). Instead, the black keys are named by where they are in relation to the white keys.

Here’s the most important point for the day:
A black key to the right of a white key is called a sharp.
A black key to the left of a white key is called a flat.

These are the symbols of sharps and flats:
…and here is how they look on a keyboard:

Do you notice anything interesting about the names of the black keys?

That brings us to another important point…

Black keys each have two names because they are always to the right of one white key and to the left of another.

Confused? It's actually not so tricky. Think about it...

Let’s say there is black key in between F and G. If you're starting at F and going to the right, then the black key is “F sharp”. If you're starting at G and going to the left, then it is “G flat”.
Before you start your Reason assignment, let’s get a little practice figuring out sharps and flats…

(Instructor: Hand out Keyboard Worksheets)

Worksheet
Please get a copy of the Keyboard Worksheet from the instructor and label all the keys. Don’t forget to write both the sharp and flat name over each black key. When you finish, have the instructor take a look. Then, use this sheet for reference as you’re doing the assignment below.

Please do the following:
1. Open Reason and create a new file.
2. Create a Redrum and load some sounds into it (bass, snare/clap, hi hat, percussion, etc.)
3. Make a 32-step drum beat.
4. Set your L marker to Bar 1 and your R marker to Bar 17.
5. Use Copy Pattern to Track to put the beat into the Sequencer.
6. Now, click on Pattern 2 and make a 2nd drum beat (16-step is fine).
7. Move your L marker to Bar 17 and your R marker to Bar 25.
8. Use Copy Pattern to Track to put the beat into the Sequencer.
9. Create a NN19 Digital Sampler.

10. Click on the Browse Patch button and load any sound into it that you like.

11. Move the L marker back to Bar 1 and the R marker back to Bar 5 and hit Play to listen to your beat play back.
12. Using only the black keys on your keyboard, come up with a melody to go with the beat. When you've got it down, record it.
13. Use ALT/OPTION-drag to Copy out your melody so that it ends on Bar 17. 14. Now move your markers so that the L is on Bar 17 and the R is on Bar 25.
15. Create a 2nd NN19 Digital Sampler and load a different sound into it.
16. Again, using only the black keys, come up with a second melody and record it.
17. When you're done, move the L marker back to Bar 1 and play the whole thing back from the start. Sound good? If not, what can you do to make it better? 18. Add any other instruments that you like.
19. Save this as: your name_black keys
20. Raise your hand and have the instructor check your work. Also, turn in your worksheet! You’ll need it for next time!

(Instructor: Be sure to collect Keyboard Worksheets for use in the following class (Week 9, Lesson 2)

Basic Keyboarding (pt. 2)

In the last lesson, we started working with the keyboard and learned the names of the white keys. We also recorded ourselves playing the C Major Scale.

So what is the C Major Scale? Let’s break it down a piece at a time…

A scale is a group of notes that go well with each other. Out of all 12 notes that you have available, not all of them sound good next to each other. A scale is a selection of notes that you know will work together and can be used as a frame for melodies that you create. Different types of scales can give you different moods, so once you know some scales, you can quickly figure out the notes you can use to make a song sound a certain way.

The Major Scale is one of the most common types of scales. A lot of people think that it has a happy, or upbeat sound.
(demonstrate)

The C Major Scale is just a Major Scale that starts with the key of C. C Major is probably one of the easiest scales because it is made up of all white keys. You don’t need to move your hand too much in order to play it. If you forgot the proper fingering, look back at the previous lesson.

So, today you are going to use the keys of the C Major Scale to come up with your own original melodies. This is easy! You just need to:
• Start with C as the first note
• Find some other white keys that sound good after C

In case you forgot which key is C…

Please do the following:
1. Start a new Reason session.
2. Create a Redrum Drum Machine.
3. Load at least 4 sounds into the Redrum (Kick, Snare/Clap, Hat, Percussion, etc.)
4. Make a 32-step drum pattern or pick a Dr. REX Drum Loop.
5. Put the L marker on Bar 1 and the R marker on Bar 17.
6. Use Copy Pattern to Track (or To Track with the Dr. REX) to put your beat into the Sequencer.
7. Click on the Pattern button to turn the beat off in the Redrum.

8. Now move the R marker back to Bar 5.
9. Make sure the Loop button is lit.

10. Hit Play to listen to your beat.
11. Create an NN19 Digital Sampler.
12. With the beat playing, click on the Browse Patch button and try to find an instrument that sounds good over your beat.

Now you need to come up with a melody…
13. First, find the note of C on your keyboard. Look at the picture of the keyboard above if you need to. Practice playing it on the very first beat of your loop.
14. Now find 2-3 more white keys to play after C. Practice playing them along with your beat.
15. When you are ready, hit Record and record your melody. Keep working at it until you get it sounding cool.
16. When you get it down, Copy the melody out so that it ends on Bar 17 at the same point as your drums.
(The easiest way to do this is to hold down the ALT/OPTION button on your keyboard and drag the melody region to the right.)
17. Save this as: your name_MoreCMajor

If you have some more time, do the following:
18. Move the markers so L is on Bar 17 and R is on Bar 25.
19. In the Redrum, turn the Pattern button back on and click on Pattern 2.
20. Make a second 32-step drum beat.
21. Use Copy Pattern to Track to put it in the Sequencer (Bar 17-25).
22. Create a second NN19 Digital Sampler.
23. Load another sound and record a new melody for this part.
24. When you've got it down, move the L marker to Bar 1 and listen to the whole beat.
25. Add anything that you think would make the beat more exciting (another Redrum, Dr. REX Percussion Loop, another NN19, etc.). Feel free to experiment with some new instruments.
26. SAVE!!!
27. Let an instructor check it out!

Basic Keyboarding (pt.1)

So, now that everyone has had some experience playing Dr. Rex slices with the keyboards, we’re ready to start playing some of the other instruments live with the keyboards. Our three main goals for this lesson are:

1.Getting familiar with how a keyboard looks.
2.Learning the names of the white keys of the keyboard
3.Recording ourselves playing the C Major scale

Keys of the Keyboard
OK, keyboards can look kind of confusing, but they are actually pretty simple once you know how they’re made up. First of all there are two main types of keys: white keys and black keys.

Here is what they all look like:

As you can see, there are 12 different keys in all.

You may be thinking, "But I've seen a piano before and I know they've got a lot more keys than that." That’s sort of true…

Take a look at this picture of a full sized piano keyboard:
Do you notice any patterns? Pay special attention to the black keys for a second – see how it’s just groups of 2 and 3 keys switching off. Can you see how the pattern just repeats itself over and over?

Basically, the whole keyboard is just made up of the same 12 keys repeating. A set of these 12 keys is called an octave. As you go to the right, the pitch gets higher, as you go to the left, the pitch gets lower, but there are always just the same 12 keys.

(Instructor: Demonstrate by playing a specific note –e.g C - at different octaves.)

"What are the names of these notes?" you ask. Super easy...
The white keys are just the first 7 letters of the alphabet (A-B-C-D-E-F-G)
The black keys are the same letters, only with extra things called sharps and flats.

We'll talk more about the black keys later. For now let’s just concentrate on the white keys:

In the picture above, what is the name of the first key on the left? What happens when you go up 12 keys to the right? If we could see more of the keyboard, what do you think the next white note to the right would be?

The big thing to remember for today…

The white keys are just the first 7 letters of the alphabet (A-B-C-D-E-F-G)

If you play each of these white keys in order, from C to C, you are playing what is called the C Major scale.

(Instructor: Demonstrate playing C Major)

Here is a video of a guy playing C Major with his right hand. Pay close attention to the fingers he is using.
If you are left-handed, play like this:

Right now you are going to record yourself playing C Major with the keyboard.


Please do the following:
1.Get a keyboard and USB cable and plug it into your computer.
2.Start a new Reason file
3.Set the Tempo to 80 BPM
4.Create an NN19 Digital Sampler (Create>NN19 Digital Sampler)

5.Click on the Browse Patch button
in the upper left corner of the NN19.
6.Now let’s load a patch called “Bright Piano”…Go to Reason Factory Sound Bank>NN19 Patches.Pianos and Keyboards>Bright Piano.smp
7.Play a few notes on the keyboard. You should hear the sound of a piano. If you don’t, raise your hand and an instructor will help you.
8.In the Sequencer, put the L on Bar 1 and R on Bar 5. (You may need to zoom in to see the right numbers.)
9.Make sure that both the Click and Loop buttons are lit.

10.Hit Play and listen to the tempo of the click.
11.Practice playing the C Major scale up and down in time with the click – each note should be played on a click. Play the high C twice. If you need to, feel free to slow the tempo down.
12.When you are ready, hit Record and record yourself playing the scale up and back.
Hint – instead of trying to hit record and play right on the first click, wait for the playhead to play through once and then start playing when it loops back to the beginning.
13.Hit Stop when you are finished. If you don’t like your performance, delete it and try again. Keep trying until you get it right!
14.Save this as: your name_CMajorScale
15.Raise your hand and have the instructor come check your work.


Additional resources:
www.looknohands.com

Piano Scale Fingering
http://www.free-online-piano-lessons.com/piano-scales-practice-techniques.html

Monday, June 21, 2010

Dr. REX_pt. 4


Discussion

Today we’re going to talk a little about rhythm. Almost all music has two main elements: melody and rhythm. Basically…

  • Melody is the part of the song that you can sing or whistle to.
  • Rhythm is the heartbeat of the song – the part that makes you move, dance or nod your head.

The main kinds of instruments that make the rhythm are drums, percussion and bass – the instruments we’ve already been working with!


In popular types of music, like hip hop and rock, you can break it down even further and say that the most important parts of the rhythm are the bass drum and the snare/clap.


Today you're going work on your sense of rhythm by playing a drum beat live using the Dr. REX. This is sort of complicated to explain, so we're going to work in a couple of steps.


Please do the following:


Part 1

  1. Get an Oxygen 8 keyboard and connect it to your computer with a USB cable.
  2. Open Reason and start a new file.
  3. Create a Redrum Drum Machine
  4. Quickly (5 min.), make a SIMPLE 32-step drum beat using only a bass and a snare/clap. Remember…clap on 5 and 13, bass on 1.


Part 2

  1. Create a Dr. REX Loop Player.
  2. Find a drum loop that has some sounds you like and load it into the Dr. REX (Reason Factory Sound Bank>Dr Rex Drum Loops).
  3. Now find the keys on your keyboard that play the kick and snare from this loop.
  4. Hit Play and listen to your Redrum beat.
  5. Practice playing the kick and snare from the Dr. REX along with the Redrum. The idea here is to play your drums at the same time as the ones in the Redrum.
  6. When you've got it down, hit Record and play along. Do this as many times as you need to get a good performance.
  7. MUTE the Redrum by clicking on the little M button in the Sequencer track. You should only hear the Dr. REX playing now.
  8. Use OPTION-drag to Copy the Dr. REX beat so that it ends on Bar 5.
  9. Move the R marker so that it is on Bar 5.
  10. Save this as: (your name)_KeyboardREX2.rns


Part 3

If you have time, add more to your beat…

  1. Create another Dr. REX and load an Instrument Loop.
  2. Come up with an original melody by playing the loop with your keyboard.
  3. Hit Record and record your performance.
  4. If you want, you can also go back and add more to your drum beat.

Dr. REX_pt.3


Welcome back! Right now we’re going to continue working with the Dr. REX, but we will be using it in a different way. Instead of using To Track to put our loops into the Sequencer, we will be playing the sounds from the loops live, using our Oxygen 8 keyboards.

The Oxygen 8 is what’s called a MIDI keyboard. MIDI keyboards don’t make sounds by themselves, but they connect to other software or hardware and let you play the sounds that are already inside.

These keyboards connect to the computer using USB cables, so the first thing you will need to do is plug them into your computer. Once they are connected, you should be able open Reason and hear sounds when you press the keys, but there might be some problems. If you can’t hear anything, please raise your hand and tell your instructor, but BE PATIENT!!! He/she might have to help other students, so wait your turn!

Once your keyboard is connected and working right, you can see how the keys work with the Dr. REX…

Dr. REX loops are actually made up of a bunch of slices. Each slice is a little piece of the whole loop. If you look closely at the display in the middle of the Dr. REX, you can see where each slice happens.

Each slice gets its own key on the keyboard, so if you play all the keys in order, from left to right, you will hear the whole loop played back, piece by piece.

BUT, another cool thing you can do is to find certain slices that sound good to you and make your own original beat by playing them with the keyboard. You can play them in any order that you like and make something completely different from how the original loop sounded. Let’s give it a shot…

Please do the following:

  1. Open Reason and start a new session.
  2. Set Tempo to 95 BPM

For this exercise, let's make a 32 step beat…

  1. Create a Redrum
  2. In Sound 1 on the Redrum, load a Clap and put it on 5 and 13.
  3. In Sound 2 on the Redrum, load a Bass Drum and put it on 1, and a few other boxes (except 5 and 13).
  4. In Sound 3 on the Redrum, load a Hi Hat and put it on boxes that sound good.
  5. In Sound 4 on the Redrum, load a Percussion sound and put it anywhere.


Now, we want to Edit Steps 17-32…

  1. Change the steps of the Redrum from 16 to 32.


  1. Move the Edit Steps from 1-16 to 17-32.


  1. Repeat steps 6 through 9.

Once you've finished making your pattern, it's time to Copy Pattern To Track…

  1. Right-click on the green area of the Redrum and select Copy Pattern to Track.
  2. Click on the Pattern button on the Redrum so that they don't play at the same time.
  3. Move your Right Loop marker (the little R) to bar 3. (You might need to zoom in to see the numbers).


Now we want to create a Dr. Rex Instrument Loop…

  1. Go to the Create menu and create a Dr. Rex Loop Player.


  1. Click on the Browse Patch button in the upper left hand corner of the Dr. Rex.


  1. Choose one of your favorite Instrumental Loops.


Now, we're going to play the loop using the keyboard. Hear how when you play the keyboard it plays the different slices?

  1. Important! Before you start playing, find the button on the Oxygen 8 called Octave. Press the down arrow button once so that the display screen reads "-1".
  2. Push Play and try making a new melody using the keyboard.
  3. When you come up with a melody that you like, push the red Record button. Wait for the cursor to get back to the L and start playing!

  1. When you are done, push Stop.
  2. If you don’t like what you recorded, you can delete it and try again. Keep doing it until you get it right!
  3. SAVE your beat to your folder as: your name_KeyboardREX1

Day 2 Goals

Congratulations on making it through your first day of the course! We packed in a ton of information and everyone seems to be picking it up really quickly.

By now, each of you should:
  • Know the main sections of the Reason interface (Instrument Rack, Sequencer)
  • Know how to Create instruments
  • How to program a drum beat with multiple patterns using the Redrum
  • How to put your drums into the Sequencer
  • How to incorporate loops into your beat using the Dr. REX
That's a lot. Please give yourself a pat on the back.

Our goals for today are as follows:
  1. Learn the concepts of rhythm and melody
  2. Get familiar with the keyboard
  3. Learn some basic scales
  4. Begin composing original melodies with the keyboard
In addition, we'll be talking a bit about other stuff like sampling and copyright issues and the history of hip-hop/electronic music production. As always, PLEASE let the instructors know if something is unclear or moving too fast. The goal is to help, not confuse!

Pre-Survey

We would like to ask you to do a short survey to give us a better idea of your background and what your programming is like.

Dr. REX_pt.2


Materials:
• Computer with internet access and speakers
• Song examples (“PYT” by Michael Jackson and “The Good Life” by Kanye West)
• Dr. Rex loop file 0401_PYT.rx2

Discussion
Today we're going to continue working with the Dr. Rex to make a remix of a song that uses a famous sample. First, let's learn about a function on the Dr. Rex called Pitch.

Changing pitch is pretty easy. You click on one of the notes in the section of the Dr. REX called Transpose:

What you should hear is the sample playing in a lower or higher pitch. The cool thing about the Dr. REX is that, even if you change the pitch, it will play back at the same speed and stay in time with your beat. This helps you to make the sample really fit in with the rest of your song.

So today, you are going to make a remix that uses a sample from a song by Michael Jackson (R.I.P) called PYT. Let’s take a quick listen…

(Instructor: Play PYT for the class. Draw attention to sampled section.)

Have you heard this sample used in any other songs?

(Instructor: Play “The Good Life”)

That’s right. Mr. West took that sample and flipped it into, “The Good Life”.


So today, you’re going to use the Dr. REX to make a PYT/Good Life remix of your own.

Please do the following:
1. Click the link above to download the file PYT.rx2 to your computer. Save this to your folder.
2. Open Reason.
3. Create a Dr. Rex Loop Player
4. Click on the Browse Patch button in the upper left hand corner.
5. Select the file 04_01_PYT.rx2 from your folder and load it into the Dr. REX
6. On the Dr. Rex click To Track.

Now we want to adjust the Pitch and Tempo of the sample…

7. Hit play and listen to how fast the sample is playing back. Adjust the Tempo to what you think sounds good.
8. Now adjust the Pitch in the Dr. REX. If you want the beat to have a fast tempo you should try to transpose the sample to a higher note.
9. If you have a slow tempo you should transpose the sample to a lower note.

After you get your sample sounding the way you want it, it's time to add some drums that go with it…

10. Create a Redrum and make a 32 step drum pattern using a Clap, Bass Drum, Hi Hat, and a Percussion instrument. Make sure you put the sounds on appropriate boxes!
11. On the Redrum, Copy Pattern To Track.
12. Create a second Dr. Rex and load a Percussion Loop.
13. Adjust the Pitch and put it To Track.
14. SAVE your beat to your folder as: your name_GoodLife
15. Have the instructor listen to your remix.

Resources:
www.youtube.com
www.grooveshark.com

Intro to Dr. REX_pt.1

Now we're going to start working with a new instrument called the Dr. REX Loop Player.

The Dr. REX is a kind of instrument called a sampler. Samplers let you load sounds (aka “samples”) into them and then play them back. A sample can be anything, from a single sound like a clap or a bass, to a full orchestra. A sample that is played over and over is called a loop. Samples/loops are a big part of modern music, especially hip hop.

The Dr. REX comes with a whole bunch of loops that you can load the same way you load a sound into any other instrument in Reason: just click on the Folder button and go into Reason Factory Soundbank. Then go into one of the Dr. REX folders and find the right kind of loop for your beat.

Keep in mind that there are three different Dr. REX folders with different kinds of loops that you can load: Drum Loops, Instrument Loops and Percussion Loops. Today we’re just going to focus on Instrument Loops.

Once you've loaded a loop, there are two main buttons on the Dr. REX that you need to know so that you can work with it in an actual song. The first one is the Preview button, which lets you listen to the loop.

The second one is the To Track button, which will actually put the loop into a Sequencer track. To Track is basically like Copy Pattern to Track in the Redrum. When you press this button, Reason will put the loop in between the L and R Markers as many times as will fit.

Ready to give it a shot?

Please do the following:
1. Open Reason.
2. Set your Tempo to 95 BPM.
3. Create Redrum.
4. In Sound 1 on the Redrum, pick any Clap and put it on 5 and 13.
5. In Sound 2 on the Redrum, pick any Bass Drum and put it on 1, and a few other boxes (except 5 and 13).
6. In Sound 3 on the Redrum, pick any Hi Hat and put it on boxes that sound good to you.
7. In Sound 4 on the Redrum, load a sound from the Percussion folder and put it on any boxes that sound good.
8. Now change the # of steps of the Redrum from 16 to 32.

9. Change the Edit Steps switch from 1-16 to 17-32.

10. Repeat steps 4 through 7.
11. Now it's time to copy the pattern to a track in the Sequencer…click on the green part of the Redrum, then go to the Edit menu and click Copy Pattern To Track.
12. Click to turn off on the Pattern button on the Redrum so that you won’t hear a double of your beat.
13. Now go to the Create menu and create a Dr. Rex Loop Player.
14. We need to load a loop, so click on the folder in the upper left hand corner of the Dr.Rex.

15. Go to:
Reason Factory Sound Bank>Dr. Rex Instrument Loops>Various Hip Hop Loops>HHP_Blimpee_95

16. On The Dr. Rex, click To Track

17. Hit play and listen to the loop play back with the drum beat. Try adjusting the Tempo and see how it affects the sound of the beat.
18. SAVE your beat in your folder as: your name_DrRex1
19. Have the instructor listen to your beat.

Now start a new Reason file and make a new beat using Dr. REX. Following the steps in this exercise, but this time select your own Dr. Rex Instrument Loop!